Tuesday, February 28, 2012

Boiled Fruit Cake/Christmas Fruit Cake Cheaters Style


"Here's a big piece for my favourite lill one", with these words heaven descended on a plate and was handed over into my tiny hands, Principal Uncle was the god handing over a piece of heaven to me, a piece of Christmas Fruit Cake. At that tiny age it was hard for me to think beyond eating that cake but Principal Uncle who was my Grandpa's friend and elder to my Grandpa, used to make this wonderful and heavenly Fruit Cake All By Himself. All I knew about him that he was a Christian by religion and was retired principal of Rosary High School, predominantly a boy's school during his term, hence we all kids called him "Principal Uncle". He was a social fixture at my Grandpa's locality and all kids loved him as he bore a cuddly teddy bear exterior and jolly personality beneath. Grandpa and I had a very special bond, I used to tag along with him every time he stepped out of home, we used to visit all of his friends, which was kind of "all male tea party". He too was a teddy bear kinda fellow with a distinct hearty laughter. They all used to talk about their good old days, shared their heroic stories, crack jokes, ponder over political issues & local problems etc while we kids sat munching our Fruit Cakes & Sandwiches. This was almost 24-25 years ago, time passed and people disappeared, I never knew how or when Principal Uncle passed away or what was his real name, now I can't even inquire about it as my Grandpa too passed away in 2006. But since last few days I kept remembering Grandpa and Principal Uncle which made me crave for that Decadent Fruit Cake, so I decided to try my luck making it by myself.

Searching on web I came to a conclusion that authentic Christmas Fruit Cake was a laborious task involving pre-planning, making candied fruit peels and worst of all it involves brushing it with brandy or rum while it ages, now thats the problem, this country being a non-alcoholic I can't find brandy or rum out here and waiting while the cake ages, COME ON, WHO DO YOU THINK P IS?!! His least accessible virtue is patience, especially when it comes to sweet edibles. So I opted a cheat version of Christmas Fruit Cake, Boiled Fruit Cake, adopted from the site www.joyofbaking.com
 
Behold............. the pearly heaven doors have opened and there's a sale, yup, a BOILED FRUIT CAKE SALE. LOL. Kidding aside I just completed my first fruit cake and my home smells like heaven. Right now the cake is duely photographed and done with the taste test, all I can say is its just AAAAWWWESOME and tastes very much like Principal Uncle's Fruit Cake, although not exactly but I can do away with the minor taste differences.
So here's to you Principal Uncle and to you Dada (Grandpa). Christmas has come much much earlier this year for me. :)


Ingredients:

1 cup warm water
1 cup light brown sugar or 1 cup refined sugar + 1 tbs molasses
1/4th cup unsalted butter 
1/2 tsp salt (if using salted butter add just 1/4 tsp of salt)
1/2 tsp cloves powder
1 tsp cinnamon powder
1 1/2 tsp ground ginger/ ginger paste
2 cups seedless raisins 

Bring all the above ingredients to a boil and keep boiling them for 5 minutes on a medium to low heat. Turn off the heat and let the mixture cool down to lukewarm.

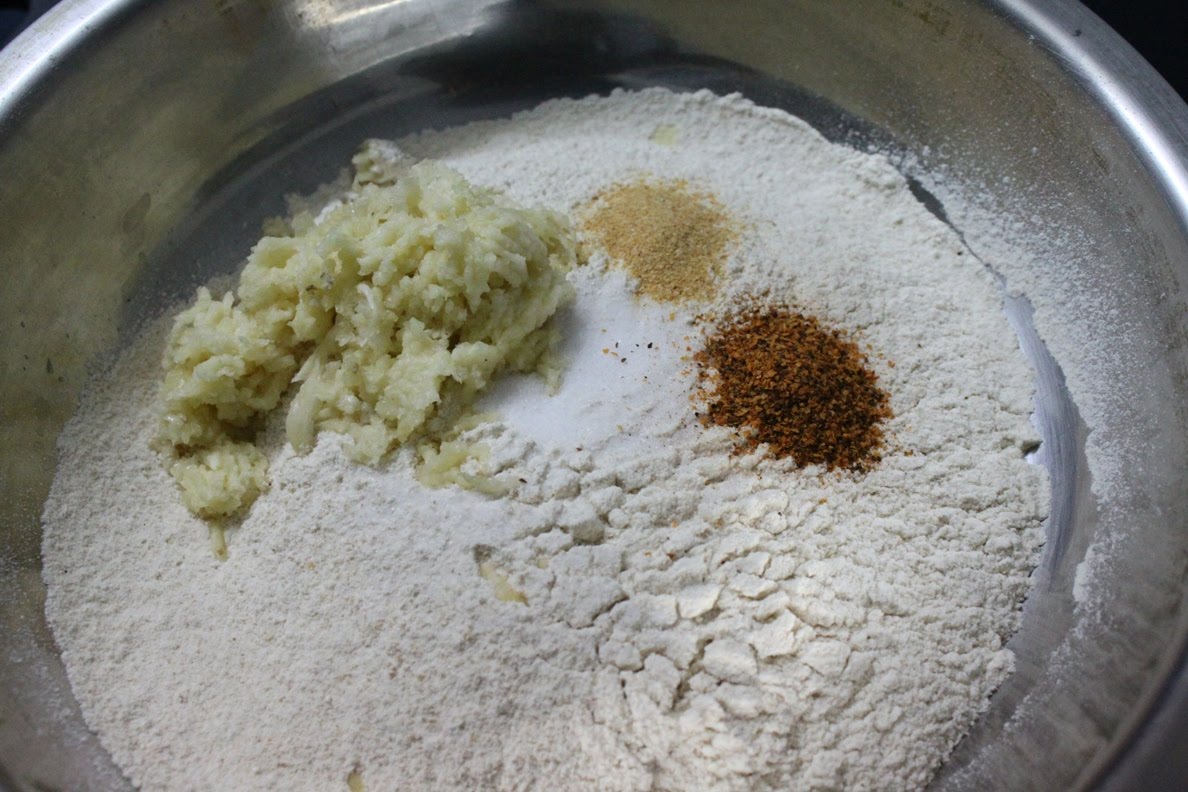
While the mixture is cooling down, take a large bowl and seive in
1 1/2 cups all purpose flour/maida
1 tsp baking soda

Mix 1 cup of chopped candied orange peel and 1 tsp vanilla powder/extract to the flour mixture. 

Lightly beat 2 large eggs or 3 small eggs in a bowl and keep aside.

Preheat the oven at 180 degree C. Lightly dust a bundt cake mould or a rectangular 9" x 5" mould and keep aside.

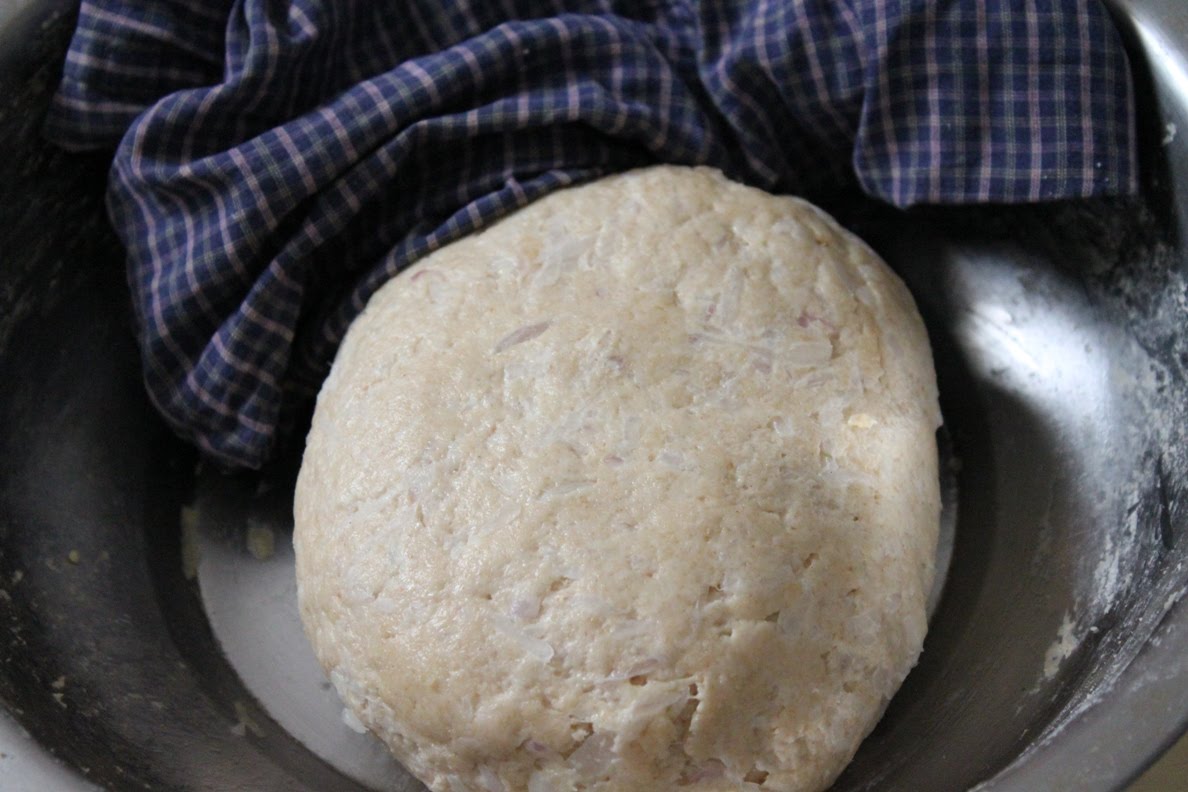
Once the mixture is lukewarm add it to the bowl of flour mixture along with the lightly beaten eggs. Mix them properly and transfer it into the baking mould/tray.
Bake the cake at 175-180 degree C for 45 to 60 minutes or untill the toothpick inserted comes out clean.
Once done let the cake cool in the mould for 10 mins, run a knife along the edge of the mould. Remove the cake carefully and place it on a wire rack to cool it down evenly.


After it has cooled thoroughly store this cake in an airtight plastic container.
This cake ages very well, the flavours enhances after a day or two, hence this cake can be prepared in advance and stored for any occasion later on.
This cake can even be frozen and stored for longer terms.
I had prepared candied orange peels a day before, I shall be posting the recipe soon.
You can use candied fruit peels of various other fruits of your choice.
You can half the quantity of raisins and add in equal amounts of other dry fruits like chopped almonds, walnuts, cashew etc. Just make sure all the dry fruits should not add up more than 2 cups in total. I used only raisins becoz that was the only thing available on hand for me. I'm planning my next batch of boiled fruit cake with dry fruit mix of walnuts+almond+raisins all equal amounts.

Verdict:
This recipe is a keeper, although this is my first fruit cake, it turned out pretty well, it has lovely moist texture, nice aroma of all those spices and a nice punch of orange peel candies. A sure surprise with every bite.


Monday, February 6, 2012

Ghaun Na Loat No Sheero/Gehun Ke Atte Ka Halwa/Whole-wheat Flour & Almond Dessert


Gujarati's are born with sweet tooth, well I might be exaggerating a bit, but for my family this stands totally true, my father, my hubby, my grandfather-in-law, infact my whole in-laws bunch are crazy sweet toothers. I have heard mind boggling stories about how my mother-in-law along with my grandmother-in-law and aunt-in-law used to prepare huge quantities of kansaar (sweet dish prepared from broken wheat, jaggery & water) and eat it as LUNCH, imagine just a sweet dish as lunch. These days we all laugh about it mentioning as old habits.
P hates sugar in his everyday meals but he is a die hard fan of sweet dishes. When it comes to choosing his favourite sweet dish, it comes down to roshogulla, soan-papdi, wheat flour halwa, sukhdi, mysore pak, gajar ka halwa etc etc, trust me the list is quiet long. I can surely say that he has one favourite sweet from every state of India.
I remember ghaun na loat no sheero was prepared by my mom on almost every other sunday, my sweet tooth dad devoured almost half of it in one sitting. After meeting P, I came to know he too enjoyed it, so just like my mom I too prepare it once a month atleast.
The best thing about this is that it is prepared using whole-wheat flour- good source of calcium, iron, fiber and other micro & macro nutrients and minerals like selenium, Jaggery- which is considered as wholesome sugar which contains more minerals and lesser chemicals than refined sugar, Ghee-which is clarified butter, milk, water, cardamom and dry fruits like almonds.
P and I both prefer it to be mild in sweetness.


Ingredients:
3/4th cup Whole-wheat flour
1/3rd cup ghee/clarified butter
1 cup warm water
1 cup warm milk
1/2 to 3/4th cup jaggery/gol/gud, crumbled
3 pinches of cardamom powder
5-7 almonds roughly chopped

Method:
Heat ghee in a deep heavy bottom pan and add whole wheat flour, mix well. Keep stirring and roast flour on medium heat till it is nice golden brown and releases lovely roasted aroma.
Now add warm milk and warm water to roasted flour, mix well on low-medium heat breaking all the lumps and stirring it till it is nice smooth. Add in jaggery and cardamom powder.
Keep stirring occasionally till jaggery has melted, at this stage do a taste-test and see if you need more sweetness to the dish, if yes add more jaggery. 
Cook for 2-4 minutes more on low-medium heat till sheero starts to separete from the sides releasing ghee.
Garnish it with chopped almonds and serve warm.


Tips:
You can add 1/2 tsp dry ginger powder/sunth powder along with cardamom powder, it tastes best during wintery months. Dry ginger powder has medicinal properties from combating cold & cholesterol to treating nausea, sea sickness and help thinning blood.
Powder of ginger root gives a nice "aahh whats that?" taste to the dish.
Always remember to use warm milk and warm water or else the roasted flour will turn up in unforgiving lumps.
If you are planning for a low fat version of this dish just replace milk with same quantity of water, ie 2 cups of warm water instead of 1cup warm water and 1 cup warm milk.

Thursday, January 26, 2012

Methi Na Thepla/Gujarati Dhebra/Fresh Fenugreek Leaves Flatbread


Dhebra is one of the most loved Gujarati tea time snacks/dishes. It is a type of paratha which has bitterness from fenugreek/methi leaves, sweetness from the sugar, sour taste that come out of curd and heat from the green chili paste. In addition to this, this paratha has the goodness of garlic & ginger, pearl millet and whole wheat flour, not to forget all the green leafy veggies going into it. It can't be healthier than this.
Gujarati's are well known for their handva, muthiya, dhokla and thepla/dhebra. Dhebra can serve different purposes like tea time snack to midnight snack and from travel food to picnic munchies. Dhebra are popular with kids to grown-ups alike.
I remember having dhebra in my school lunch box prepared by my mom, BTW she makes the most flavourful dhebra I've ever tasted. This is her recipe. So here's some recipe which just can't go wrong.

Makes 20-22, 6" diameter dhebra.
Ingredients:
3 cups firmly packed chopped fresh fenugreek/ methi leaves
1 1/2 cups whole wheat flour/ chapati flour
1 1/2 cups pearl millet/ bajri flour
2 tbs of oil
3 pinches of hing/asofoetida.
2 tbs green chili, ginger & garlic paste
1 1/2 tbs sugar
3 tsp kashmiri red chili powder
2 tsp turmeric powder
Salt to taste, usually requires 2 to 3 1/2 tsp of salt but it can be adjusted according to taste.
1/4th cup yoghurt (a little bit of sour yoghurt is best for this recipe)
Few mls of water for kneading the dough.

For cooking we shall require a few more tbs of oil for shallow frying. About 1/2 cup of whole wheat flour for dusting.

Method:
In a deep bowl all both flours and 2 tbs of oil, give it a nice rub till the oil is nicely incorporated in the flour.
Now add all the spices, ground paste, sugar and salt and give it a nice rub once again.
Add fenugreek/methi leaves and mix it well.
Now start to knead a semi soft to hard dough adding a tablespoon of yoghurt at a time, till you run out of 1/4th cup of yoghurt. Add water to knead dough after this, remember pearl millet doesn't need too much liquid to form a dough hence add few tbs of water at a time.
Dough should not be runny at all, you should be able to make ping-pong sized balls out of it.
Let this dough rest for 20-30 mins.

Now make ping pong sized balls out of the dough and roll out 1/4th cm thick paratha, using whole wheat flour for dusting. Heat tava/griddle/non stick pan (if planning to make oil free dhebra) and place rolled out dhebra/paratha on to it. After 30 seconds turn dhebra with spatula and let it cook on the bottom side. Apply 1/4th tsp of oil on the top surface and turn it to shallow fry, press your spatula and keep turning the paratha every 20 seconds till golden brown spots appear on them.
Repeat this with all the remaining dough balls.

Dhebra can be served with pickles,jam, coriander chutney, garlic chutney, spiced curd, sweet curd or any dal or curry of your choice. This paratha/dhebra goes very well with masala chai/tea.
Dough
Shallow fried with golden brown spots

Dhebra served with sweet & spicy lemon pickle

Monday, January 23, 2012

Beetroot Stir Fry/ Beetroot No Sambharo


I know I have been neglecting my poor blog since quiet a long time, but here I'm trying to redeem myself. :)
Having many hobbies has its drawbacks. I just finished one of my crafts project which had been pending since long, it took time but its complete now and so I'm back to blogging.
Today I was planning to make a simple healthy dish and found some beetroots, which were neglected since few days, so I decided to do them some justice.
Beetroots either you love them or you hate them. Though they are highly nutritious and loaded with antioxidants, not to mention their importance for our cardiovascular health, these roots are ignore and mostly restricted to salads. So I wanted to make something simple and special with these beauties. To my surprise this dish came out well, tastes good and looks pretty too. For a picky eater like me, I can say I can eat this dish alone in itself.
So here goes the recipe.

Ingredients:
2 Large beetroots cubed and boiled
1 tsp canola oil/sunflower oil
1/2 tsp cumin seeds/jeera
1/2 tsp mustard seeds/rai
Pinch of asofoetida
1 sprig of curry leaves/mitha limda
2 green chillies cut in half
1/2 tsp amchoor powder/dry mango powder
1/2 tsp turmeric powder/haldi
1 tsp kashmiri red chili powder/ mirchi powder
Salt to taste.

Method:
Pour oil in nonstick skillet and let it heat up. Add mustard seeds & cumin seeds, let them come to a splutter, then add in curry leaves and green chillies along with asofoetida.
Add boiled beetroot cubes along with all the spices and salt to taste.
Do not add water as this dish is intended to be dry.

This dish can be served as a side dish with any curry or rice dishes.
Amchoor or dry mango powder is added to balance the sweetness of beetroot, it gives this dish a nice tangy kick on the other hand red chili powder adds the spice level making this dish sweet sour and spicy, all at the same time.
I'm planning to enjoy this dish with spinach stir fried with onions and garlic and hot rotis.

Wednesday, May 26, 2010

Mayonnaise-Easiest Homemade Recipe


Internet is a funny thing to browse, today while searching for a homemade deep conditioning hair pack I came along a website rather a group/forum named long hair community which intrigued me, as I myself have tailbone length hair I had to see what people with long hair do, to take care of their long mane, few of them had mentioned using mayonnaise as deep conditioning hair pack. What, did I read something about food?!! and the foodie spirit rose, so do hell with hair care I was now searching for easy homemade tasty mayonnaise.

Previously P had tried to experiment with Mayo making and had failed drastically, he was following a recipe told by one of a very dear friend of his and somehow, don't know how he blotched it up ... (giggles) and was sad that whole weekend for his experiment gone wrong... (more giggles). By the way Salah, you were right its really easy and P you really did something wrong. So since then we stuck to the store bought Mayo all this time, until today.
Being haunted by the last experiment, this time I watched a few videos before trying out another blotched batch of dreaded mayo.There was a slight fear of embarrasment on "what if P has nice amusement at the cost my failed experiment", but sorry P you won't have that privilege now that my mayo is successful, but ya you can enjoy it with your chips if you want... (many more giggles).
Found some nice YouTube videos to whip up mayonnaise in no time, here is a sample of it.

I wanted to master the basic recipe first then try and learn more about flavoured mayo so tried a very basic version of mayo. Here goes my very simple "how to whip mayo at home" recipe.

Crack two fresh eggs in a deep narrow container, add 1/2 tsp salt and 1 1/2 tsp vinegar, whip it using a hand held/stick blender for about 10 seconds.
Keep the blender running and start pouring 1 cup sunflower oil/vegetable oil/olive oil/mix of those in a very thin steady stream. At no point should you switch off the blender.
And there you go, within no time shall you see the lovely mayo forming with a nice creamy texture. Whip it till you feel the consistency is right.
Add freshly crushed pepper if you like.
Store it in a jar and refrigerate it.


Remember if you like a more thick mayo add a little more oil about 20-30 ml.

As simple as that. Here are a few more snaps of the process.

Its hard to multitask here with blender buzzing in one hand and camera on another, so could not snap the pouring of oil at this stage.

Checking for the right consistency. Could not resist the temptation of licking off the spoon.:)

Sunday, May 23, 2010

Garlic Paratha (Frozen and/or Ready To Eat)


As promised last week while posting Onion Paratha, I'm here with the recipe of Garlic Paratha, easy to make and divine food for garlic lovers like me and P. I have frozen this paratha because I plan to make them in a jiffy during weekend, as you know no one likes to work on weekends and I too need a break from cooking but we got to eat our meals, so I've prepared them in advance and frozen them so when the weekend comes all I need to do is remove them from freezer and let them thaw and then shallow fry them with minimum oil possible and enjoy.
If you don't plan to freeze them then just roll them into paratha and directly shallow fry, as simple as that.

Now, as to why I prefer this parathas on weekend?!! very simple, weekends makes you eat most of the junk food which you tend to avoid during the work days like movie time chips and dips or pizza's and pastas etc etc and the best thing is that these garlic parathas are a gastronomical boon to those digestively challenging foods. Garlic tends to calm our digestive system and not to mention the other cardiovascular, antibiotic, anticarcinogenic, antioxidant benefits, the list is quiet long to mention.


Ingredients:
2 cups whole wheat flour/gehun ka atta
15 cloves of garlic crushed
1/2 tsp garlic powder
1 tsp paprika/kuti hui lal mirch
1 1/4 tsp salt
2 tsp light corn oil/sunflower oil/canola oil.
About 1 cup luke warm water to knead the dough.


Method:
Take the flour add in all the ingredients and knead a soft, non sticky dough using just enough luke warm water. Cover the dough with moist kitchen towel and keep aside for 30 minutes.


Divide the dough in 12 equal portions and roll it into a smooth ball. Roll out parathas and store it in a tin box placing plastic sheets in between the parathas, this way they won't stick to each other. Cover the tin and place it in freezer.


Now whenever you need Garlic Paratha, just remove them from the freezer and let them thaw and shallow fry them using little oil on both sides till you get light brown spots on paratha.


Enjoy them with curry or raita or dal of your choice. We enjoyed them with freshly made nimbu achaar/lemon pickle and carrot raita.

Tips:
These parathas can also be used as wraps for making vegetable wraps or egg rolls or any imaginative wraps you could think of. Just be innovative :)

Cherry & Peach Preserve In Sugar Syrup


Finding good fresh fruit is not a big issue here in Riyadh but there are times when you find best fruits at a steal price and that is when I like to preserve them for future relish. I managed to grab a nice batch of peaches and cherries from my local super market. After having enough of fruit devoured I managed to save some to preserve it for future.
I shall be using preserved peaches for upside down peach cake and cherries for black forest cake, ofcourse shall be posting them whenever I bake them :). They also come in handy while preparing tarts and pies. These fruits can also be preserved as jams and can be enjoyed with cakes, breads, muffins, bagels, croissant etc etc or as a mid day or late night snack.


Step 1 - Take 1 pound ripe peaches, soak them in almost boiling hot water for 60 seconds and then imediately soaked in cold water to remove the skin. Cut them and discard their pits. Slice them as per your requirements.

Step 2 - Add 1/3 cup sugar it to the sliced peaches. Dissolve 1/4 th tsp citric acid crystals/nimbu phool in 3 tabs of chilled water and add this to sliced peaches. (Citric acid crystals helps preserve the colour of the fruit and prevents it from darkening)
Mix well and let the sugar melt.

Step 3 - After the sugar has melted arrange the slices in sterilized glass jar (big enough to hold whole batch) put on the lid as tightly as you can and let it sit on the counter for 15 more minutes. Then place it in the freezer.


For cherry preserve skip the first step and just remove the pits of the cherry and follow with step 2.

All done so now whenever I shall require them all I need to do is just thaw them and use it up.

Friday, May 21, 2010

Do Ki Dal-Version 1/Mixed Dal/Pigeon pea & Black Lentils simmered with onion, tomato, green chili,garlic & ginger.


Daily meals should be simple, nutritious and satiating but no one talks about flavors... ofcouse every day meals can be as flavorful as those served at your favorite restaurants and the best flavors can only be achieved by using right ingredients in correct portions and adding them during the cooking process during the right time, this is exactly what the budding chefs are taught at the culinary schools. Talking about chefs and restaurants reminds me of my favorite dal makhani/ kali dal, which is laden with butter and cream and calories, which ofcourse we can have occasionally but we all know how we miss those flavors and aroma of our favorite dish, so what to do?!! ... fool our senses... yeap you're reading right we can surely fool our taste buds by fooling our olfactory nerve endings located in our upper part of interior nose which detect flavors. Using right seasoning achieves that.
So today thinking of my favourite dal makhani I decided to fool my senses and eat right, ofcourse without missing out all the fun. I used Ghee for tempering which gave dal right aroma and seasoned it in such a way that it right flavor. 

        Low calorie mixed dal served with rice steamed with cinnamon and cloves....now thats healthy!!

Ingredients:

1/2 cup toor dal/pigeon pea lentils
1/4 cup whole urad dal/black lentils
1 1/2 tbs chili-ginger-garlic paste
1 tbs ghee/clarified butter for tempering
1 tsp cumin seeds/jeera
1/4 tsp asafoetida
1 medium sized onion chopped finely
2 tbs tomato paste/2 medium sized tomatoes finely chopped
1 tsp turmeric powder/haldi
1 tsp red chilli powder/kashmiri lal mirch powder
salt to taste
1-2 cups of water
handfull of chopped coriander leaves

Method:
Pressure cook the lentils/dal and keep aside.
Add ghee to heavy bottom pan and add cumin/jeera, once they start crackling add asafoetida and onions.
Saute for about a minute or two and add in tomato paste/chopped tomatoes and green chili-ginger-garlic paste. Let this sizzle for around 2 minutes.
Then add in turmeric and red chilli powder. Cook for a minute or so.
Add the cooked dal after mashing them a little with the back of a ladle.
Add water to adjust the consistency of dal, we don't want dal to be as thick as dal makhani rather. I almost added 1 & 1/2 cups of water to achieve the consistency shown in the snaps. So adjust water according to your needs.
Add salt to taste.
Let the dal sizzle for 5 more minutes then turn off the heat
Garnish it with chopped coriander/cilantro

Serve it with steamed rice or as a side dish along with paratha, naan or chapati of your choice. Goes along with any stir fried vegetables and chapati too.

Tips:
Serving this dal with rice steamed with cinnamon and cloves gives it nice additional aroma.

Thursday, May 20, 2010

Limbu Nu Galiyu Athanu/Nimbu Ka Achaar/Sweet & Spicy Lemon Pickle (Oil Free)


Gujarati Cuisine is never complete without a athanu/achaar/pickle and/or sambharo of any kind. Sambharo is nothing but a few veggies stir fried in light oil along with mustard seeds, turmeric and asafoetida, but I shall not be talking about that right now... will post a few sambharo recipes later.
Today I shall be talking about Pickles, there are so many pickles in gujarati cuisine that a whole blog can be dedicated to it... well I don't intend to do that literally but I'm just making a point to the number of variety of pickles. P loves Lahsan nu athanu (garlic pickle) and I prefer Keri nu Khattu athanu(Mango Pickle). Every household has its own way and recipe of each kind of pickle may it be garlic pickle or mango pickle; mix veg pickle or carrot pickle and these range for spicy to sweet to just tangy...
In old times each pickle was made painstakingly by roasting and grinding each and every individual ingredient and then concocting them to make a wonderful aachaar/pickle, reminds of Egyptians and the Mummification process .... giggles. But during these times of hi-tech age, pickles too have gone hi-tech, proof.... just visit any supermarket isle of Indian food and you shall find ready made bottle pickles, made with preservatives and added vinegar etc.... authentic pickles never had any of these. Won't admonish those ready made pickles more coz I myself have a couple of them adorning my fridge... :)
P and I have never been much of a sweet pickle persons but ever since my mother in law prepared a lovely oil free limbu nu athana a few years back during my visit to India, the mere process of making it made me fall in love with it and the oil free tag was even more attractive than ever before. My mom too made this pickle and in a way by very similar method but you know we kids how we ignore and underestimate our own mom, I literally used to avoid contact of any sort of that pickle and so did my siblings ... sorry mum mi :)

So talking about the lemon pickle, this pickle has the potential of adding some zing to any regular boring meal. Prepared with just 4 ingredients and placed in sun to bake under pure solar heat, one of the easiest and tastiest pickle I've ever made. This pickle tastes much better with jaggery but I didn't have it in my pantry, so had to settle for sugar instead.


Take 1 1/2 kg lemons, wash them and MAKE SURE TO WIPE EACH LEMON DRY INDIVIDUALLY, after wiping them off let them sit in open air on a counter top or any driest place possible, this will make sure that there is no damp spots on lemons. Cut each lemon into 8 wedges, if you are taking smaller sized limes (kind of those we get in India) cut them into 4 wedges.
Take a large transparent air tight glass jar (make sure its thoroughly dry) big enough to fit in all the lemon wedges and stack the wedges in it.
Add 1/3 cup salt  and close the jar and shake well. (This process was done on 23rd april)
Place the Jar in sun for about 20 to 25 days, make sure to shake the jar atleast twice a day. After 20 days check if the lemon wedges for the softness, apply pressure with you thumb and index finger and if they give away the wedges are ready for the next step. If the wedges don't break off then close the jar and keep them in sun for a week more. The baking of wedges totally depends on the sunlight it receives and the atmospheric conditions, here in Riyadh, which is a middle of dessert there is no scarcity of sun and hence my pickled lemon wedges were ready in just 18-19 days.

Now add in 750 grams or 3 cups white sugar (added on 12th may) close the jar and shake well, keep it in sun for couple 6-7 days or till the sugar has melted and wedges duly marinated in it. Mean while make sure of that shaking the jar twice a day. Keeping in sun at this stage helps to slowly cook sugar and gives it a nice caramelized flavor and texture.

Now on the brink of completion just add in 3 tbs red chilli powder/kashmiri lal mirch (added on 18th may), close the jar and shake well.
Done.
Now you can enjoy this pickle whenever you want. What I usually do is that after adding red chilli powder, I let the pickle rest for couple of days in the big jar and then transfer them into smaller individual jars and place them in fridge, this way most of the pickle will remain air tight and fresh while I have just one small jar out for daily consumption.

The best thing about this pickle is, as it ages its nutritional value increases. You can expect it to change into a bit darker shade after a couple of months but it is suppose to happen, so don't sweat.
This pickle has a self life of upto 5 years in an air tight container and about 9 months to 1 year once its opened, but then it won't last that long. :)


Forgot to take snaps of the big jar (the one in which I prepared the pickle) so this is one of my 4 individual smaller air tight jars.

Tips:
You can add equal amount of Jaggery instead of sugar for additional benefits of avoiding refined sugar.

Tuesday, May 18, 2010

Moist Mocha Chocolate Cake


I prepared this cake last Wednesday but my procrastination delayed its posting. Although the cake is duely devoured by me and P, the main reason for procrastination was that during the process of removing the cake from the base of spring tin, I successfully managed to crack its top crust and my need for baking perfection went into a stress mode. Even while eating the last bits and crumbs of the cake I couldn't help thinking how nice it would've been if it had been PERFECT bake and how perfect it would have tasted than (as if the crack in the top crust dissolved some of its flavor, eyes rolling and silly me ). I know I know sometimes I find myself being a bit "Monica'ish" but then can't help it either. At one point I ruled out this one as not being "blog-worthy" too... sigh.
But now as the Monica personality is wearing down and the taste lingers of that "near perfect" mocha chocolate cake, the crack kinda disappears in my mind and all I remember is the perfect flavor, delicate texture and right crumb of the cake. So here is the recipe of my nearly perfect and not so blog-worthy Coffee/Tea Time Cake. :)

                             "Perfect" at this stage.
Seive together in a large bowl
1 cup pastry flour
1/4 cup unsweetened cocoa
1 cup sugar
1/2 tsp baking powder
1 tsp baking soda
1/2 tsp vanilla extract (I used powdered extract so add in dry ingredients, I you are using liquid extract add it along with wet ingredients)
1/2 tsp salt

Prepare Coffee: Add in
1/2 cup hot water
3 tsp instant coffee granules (I used Maxwell instant coffee, add in any brand you prefer)

Using a hand blender mix
1/2 cup Hot coffee (Prepared in previous step)
1/2 cup milk
1/2 cup vegetable oil or canola oil
1 egg
blend for 2 minutes.

Preheat oven at 175 Degree C. Grease and dust 8" or 9" cake Pan, anything smaller than this and your cake shall over flow.
Add wet ingredients to dry ones and stir gently using a wooden/rubber spatula. Do not over beat, I repeat do not over beat or else you shall end up with mocha chocolate bread.
Gently pour this cake mixture into the greased and dusted pan and place it in the oven.
Bake for 30-40 minutes or till the toothpick inserted in center comes out clean.
                                                 Can you spot the crack... its right there!!!!

                                                       Hope now you can see it!!!

                                                             Ah, the flavor still lingers!!!!

Monday, May 17, 2010

Onion Paratha (Frozen and/or Ready to Eat)


The other day I was surfing the frozen food section at some supermarket and came across a huge stash of frozen onion paratha, garlic paratha, plain paratha etc etc, at first its fancy packing and mouth watering snaps made me pick one onion paratha packet but it was then that I turn the packet to read its ingredients, very next instance I found myself thinking, "this is the most unhealthiest paratha that I would every lay my hands on, I'm sure I can do much better than what these wholesale manufactures can provide us in the name of ready meals" and duely placed the packet back to its assigned frozen spot (Now come on, I won't be naming brands here :) .
After reaching home I duely grabbed few things to put my thoughts into action and the approaching weekend was the best reason to whip up some recipe and stack my fridge with ready to eat tasty things. So mixed, kneaded and rolled the parathas and stacked them one on top of the other seperated by thin sheets of polythene, closed the tin box and placed it in freezer, so all I had to do on weekend was to thaw the paratha for 20-30 mins or so and shallow fry them on a non-stick pan using as little oil as possible.

Ingredients:
2 large onions grated
2 cups whole wheat flour
2 tsp salt
2 tbs oil
1/2 cup to 1 cup warm water.

Mix onion, flour, salt, oil and knead a soft dough using required quantity of warm water (pour little water at a time and knead dough using hands instead of spatula or spoon, this way you shall know when the water is just enough). Cover the dough with moist kitchen towel and keep aside for 30 minutes.

Divide the dough in 12 equal portions and roll it into a smooth ball. Roll out parathas and store it in a tin box placing plastic sheets in between the parathas, this way they won't stick to each other. Cover the tin and place it in freezer. Now whenever you need Onion Paratha, just remove them from the freezer and let them thaw and shallow fry them using little oil on both side of paratha.


The best thing about this paratha is it can be enjoyed with anything from raita to sabzi and from your favourite curry to aachar. I could just roll one and gobble it down plain itself. So have it frozen or have it fresh... its your pick.... anyways it was far far better than the store bought plastic flavoured sheets, which I luckily avoided. :)


For the next weekend, planning to make some frozen Garlic Paratha, will keep you posted.

Sunday, May 9, 2010

Ringan Nu Bhartu/Baingan Ka Dahiwala Bharta/Eggplant & Yogurt Dip With Fresh Spices


Baingan ka bharta is a predominantly Punjabi dish made from eggplant/baingan, grilled over charcoal or direct fire to impart a smoky flavour to the flesh of the eggplant and then cooked with spices and vegetables and served with variety of breads or as a side dish.
But today I shall be making an another version of it, this has a shades of Middle eastern dish called Baba Ghanoush but nevertheless is authentic to Western Indian Cuisine.
P loves this dish and devours every bit of it every time we have it for lunch/dinner. It has sweetness of eggplant, tangy taste from yogurt and green chillies give it a kick of hot and onion is added for its ability to enhance flavors of other fellow ingredients. This dip/side dish is especially prepared during summer time when the sun is blazing hot; yogurt has cooling effect and onion helps combat sun stroke; not to forget that this dish is very light and friendly to our digestive track. This is the only eggplant dish that I prefer eating wholeheartedly, as unlike P I'm a very picky vegetable eater. :)

Preheat oven to 450 degrees F (230 degrees C). Place 1 large eggplant/baingan on a baking sheet and bake 20 to 30 minutes or until tender. Remove from heat, cool, peel, and crush.
OR
Pressure cook the eggplant, cool, peel and crush.
Add 1 large onion chopped finely.
300 gms yogurt
2 green chillies chopped finely.
handful of finely chopped coriander leaves/cilantro
salt to taste
1/4 tsp freshly ground peppercorns/kali mirch powder
Mix well and refrigerate it for at least 1 to 2 hours before serving.

Serve it as side dish with any meal of your choice or along with any bread of your choice, tastes lovely with pita and/or paratha.

Sunday, May 2, 2010

Dudhi Kofta Curry/Bottle Gourd Kofta Served in Aromatic Curry


Kofta curry is a part of Awadhi cuisine, the Awadhi cuisine goes back a long way in history to the days of Moghul reign, Awadhi cuisine originated from Lucknow, Uttarpradesh, but bears an uncanny resemblance to Muglai cuisine. Both cuisines are famous for their Nawabi food and Badshahi flavors, cooked to Dum and painstakingly prepared keeping in mind the delicate flavor of each spice that went into the dish. Awadhi cooks, rather the skilled chefs who prepared the exquisite dishes were called khaansamas.
Kofta can be prepared in various ways eg; malai kofta; vegetable kofta; paneer kofta; and not to forget all the other non-vegetarian versions of it.
Today I shall be testing my culinary skills by preparing Lauki Kofta Curry, which has a nice creamy texture, subtle taste and delicate aroma to it. Lets see if my test subject (P ofcourse) likes it or not :).

For Kofta
1 cup grated dudhi/lauki/white pumpkin/bottle gourd, squeeze and remove excess juice from it. Reserve the juice and keep aside.
1/4 cup rice flour
1/2 cup besan flour/chick pea flour
1 tsp ginger-green chili paste
1/2 tsp sugar
1-2 tbs yogurt
pinch of soda-bi carb
1/2 tsp haldi/turmeric powder
1/2 tsp red chili powder/paprika
1/4 tsp garam masala/ all spice powder
salt to taste
combine all ingredients and make a soft dough, shape 12 equal sized kofta and deep fry in any vegetable oil on medium heat
(you won't require any additional water for the dough formation as bottle gourd tends to release water when salt is added but just in case the mixture is too dry to form dough balls add the reserved bottle gourd juice 1 or 2 tbs)

For Curry
Grind to paste
2 medium sized onions
1 inch piece of ginger
4-5 cloves of garlic
2 tbs til/sesame seeds
1 tbs saunf/fennel seeds
3 cloves
5 peppercorns
1 inch piece of cinnamon
2 cardamoms
Heat 2 tbs oil in a heavy bottom pan and add the ground paste. Saute it for a few mins till the raw smell of onion has gone and the paste becomes glossy.


Then add in
2 tsp kashmiri lal mirch powder/ red chili powder/paprika
1/2 tsp haldi/turmeric powder
and saute for few more mins.

Add tomato puree of 3 ripe red tomatoes (blanched and then pureed). Cook till gravy become glossy again.
Then add in
1/2 cup water
2 tbs fresh cream
salt to taste
Bring the gravy to a boil.

Then add in 1/2 cup milk and 1 tbs honey
Cook for 3-4 mins stirring occasionally.
Add kofta and put a lid to the pan, cook for 5 more minutes. 2 mins into cooking check if the kofta has absorbed the liquid, add the reserved bottle gourd juice if gravy feels dry or grainy. Turn off the heat and garnish it with handful of chopped coriander/cilantro.
Serve warm with naan/paratha/roti/pita bread/rice of your choice.


Tips:
Can also add bay leaf to oil before adding the onion paste, I have avoided it because P and I both dislike the flavour of bay leaf.
Add grated carrot to the kofta instead of sugar to get the all natural sweetness in kofta.
This dish has a very delicate flavor to it, add 1/2 tsp of garam masala/ all spice powder to the curry if you wish a bit sharper flavor.

Saturday, May 1, 2010

Khari Biscuits/Surati Khari-100% cheaters recipe

Well, I confess, I cheated, but I have a perfectly valid reason for it, I was yearning for surati khari biscuits so much that I didn't want to wait till my vacation to Gujarat, sole land where I can find khari biscuits, can't expect to find that perfect khari here is Saudi Arabia, sigh :(. So I cheated my way to make khari at home. I know it sounds impossible but I did manage to make it in 15 mins, well literally 25 mins :).
I used Puff Pastry Squares that are readily available at any supermarkets, cut them into 3, brushed it with milk and baked in preheated oven at 200 degrees C for 23 minutes. And done, perfect flaky khari biscuits for that hot afternoon tea. All I need to do now is wait for P to come home then make perfect masala chai and enjoy my Khari with a person who too is head over heals for khari, he can be termed as die hard fan of khari.
Enjoy the snaps of my finished product.
                                                               Just out of the oven!!!

                                            Check out the layers... beauty ain't they?!!

            Thorough inspection to see whether they are well baked to its middle-most layers.

                        Can't stop admiring those lovely flaky layers. Almost drooling at this point... :)

                                                                    Cooling off.

                     I bet these won't even last 2 days. Would you like to have some?!!!