
I know you guys might be thinking whats with me and baking, well the reason is, I have a brand new oven on my hand, isn't that good reason enough?!!! As you must have guessed these days I spend days searching and surfing for good baking recipes and what better than baking the most basic baking recipes, so I thought of baking my own buns for pav bhaji, which I have planned for dinner tonight.
Now surfing for pav-bhaji pav was a daunting task in itself, many bloggers had attempted to prepare and bake these goodies, but what I was looking for, was the very very basic ladi pav that we get at pav-bhaji stall in any city in India, some call it maska pav, some double roti and some ladi pav. Ladi pav means a slab bun, it literally is a slab of multiple buns stuck together and is well known for its soft tender interior and crunchy upper crust. It has pillowy goodness which would meet the standards of any delicate royalty, here I can surely say it melts in your mouth without any effort at all. Ok I feel the readers yawning.... so coming back to the quest for the perfect recipe, there are many bloggers who have either over baked it or looking at the snaps of their creation didn't satisfy my standards of perfect pav, either they were too crunchy interior or hadn't puffed enough or where just plain dry to look at, I could feel the hardness of the pav from the pictures itself, but too be very frank some did meet my stringent standards.
After being too critical labeling recipes as hard, flat, dry etc, I was very doubtful about the recipe that I decided to try my baking luck on, but to my delight it came out just perfect and I wouldn't change a thing. Hope you enjoy watching it, as much as I did, baking it.
Ingredients:
2 cups of APF/Maida
1 1/2 tsp sugar
1 tsp active dry yeast
2 tsp butter melted
1 tsp salt
1 cup luke warm water
2-3 tsp of milk for brushing
Preparation Method:
Take 1 cup luke warm water and add yeast and sugar, mix well and let it rest for 5-10 minutes. This is done to activate the dry yeast by feeding it sugar and warm water. After 5 minutes you shall notice that a layer of bubbles have started to form on top of the water, this is the sign that yeast is ready. At this point add salt and mix well.
On a wide working surface take APF and make a well in middle. Pour the water sugar and yeast mix to this well and start kneading a soft dough. At the very start you might feel that you have added excess water as the dough might be very very sticky and hard to handle but rest assure APF will soak up all the water and turn into soft pliable dough in just a few minutes of kneading. Key to it is "Keep Kneading". After a solid 5-8 minutes of kneading the dough will be soft and almost non-sticky, rather glossy and light to feel, now add 2 tsp of melted butter and knead a bit more. Just enough to incorporated the butter in the dough.
Lightly oil a very large bowl and place the dough in it. We are taking very large bowl coz the dough shall rise and double its size in it.
Cover it with cling film or put the bowl in plastic bag and put a knot to it. Place the bowl of dough in a warm place for 1 & 1/2 hours to 2 hours to rest and rise.

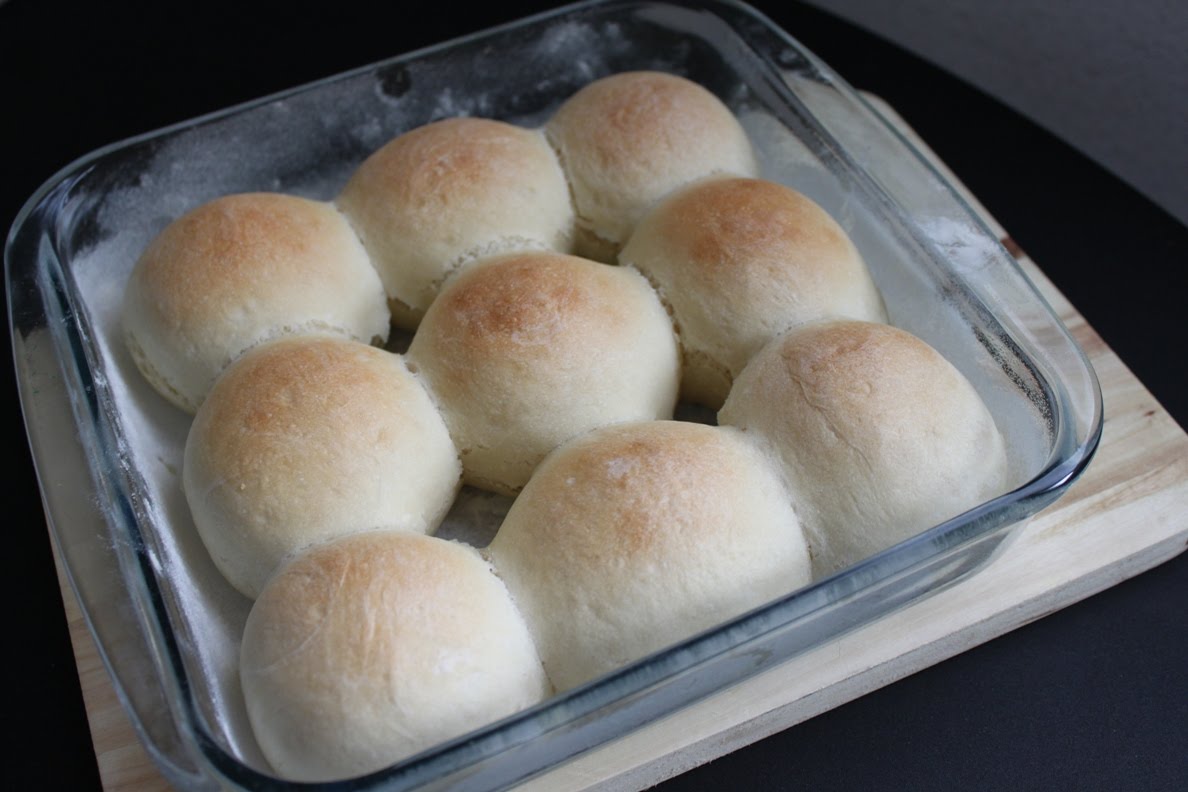
Open the dough and punch it down so as to release all the air from the dough, 3-4 knocks are enough. Now divide the dough in 8-10 chunks and roll them into a very smooth balls (I made 9 equal dough balls).
Dust a tray or a pan in which you intend to bake pav. Place the dough balls at 1-2 inches distance, cover it with cling film again and keep aside for 30 minutes.


Preheat the oven at 190 Degree C for 10 minutes.
You shall notice that dough balls might have risen and shall now be slightly touching each other.

After 30 minutes of rest time dough balls brushed with lill milk.... now almost touching each other
Brush the top of the pav with milk using a cotton ball or a kitchen towel or a brush (I prefer using silicone brush) and place them in oven. Bake for around 25 minutes or till they are golden brown on the top (my oven took 28 minutes to be precise)

Baking in oven


Enjoy along with marmalade or butter or pav bhaji or vada pav or misal pav or usal pav or dabeli or egg curry or egg bhurji... options are endless.
Tips:
Kneading the dough for 5-8 minutes helps to form gluten in the dough. Gluten affects the elasticity and hence the chewiness of the bread, in short directly affects the volume of baked product. In general, bread flours are high in gluten while cake flours are low. We want our breads to be airy and elastic and our cakes to be moist and tender. The amount of moisture in the dough also affects the formation of gluten. Baking schools teach that to make a perfect white bread one has to add 55% of moisture to flour proportion.
Brushing milk on the top of the dough balls ensure that we have a nice crust to the pav. It also ensures a nice sheen to the pav.
Rub a little butter on top of the pav after they have been baked and removed from the oven. This will ensure that the pav remains moist and soft and also add a bit more sheen to the finished product.
Always remember if you are using 1 cup of APF add 1 tsp melted butter at the end and if using 5 cups of APF add 5 tsp melted butter in the end... in short ratio is 1 tsp butter per cup of APF.

Wow, your rolls are absolutely perfect! Mine are always a bit differently sized and shaped but these are amazing! :D
ReplyDeleteAwesome recipe... thanks for sharing the insight knowledge...
ReplyDeleteLorraine and Silvi, thanks a ton for your feedback. I really enjoyed baking them.
ReplyDeleteYou rock!! just one word- "PERFECT"! :)
ReplyDeleteThanks Chaitali.......
ReplyDelete